WhatsApp: (86) 17861237822 | Tel: (86) 13280733133
WhatsApp: (86) 17861237822 | Tel: (86) 13280733133
20+ years in trailer components, U.S.-focused. Customization is core—adheres to strict American quality standards, with inspection-friendly features (accessible bearing caps, wear indicators) in custom builds.
Simple process: consult to understand your maintenance/usage needs → tailored specs (prioritize durability/inspectability) → quality-controlled production. Serves DIYers, shops, fleets—backed by responsive support and inspection tips.
20 years of trailer axle manufacturing experience. Specialized in Australian customization (45/50mm options). Compliant with standards, 24h after-sales, on-time delivery to Australia.
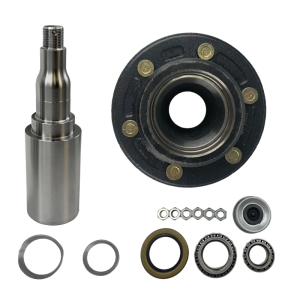
Spindle and hub matched to fit—no fumbling with wrong sizes, works first time.
Smooth spin cuts friction, makes towing feel steadier on any road.
Tough build handles heavy loads without bending or wearing out fast.
Sealed to block dirt and water, keeps parts clean and rolling longer.
Fits most trailers, easy to bolt on with basic tools—no pro help needed.
Stays reliable through rough hauls, minimal checks required to keep going.